About Me

Thursday 27 June 2013

Database Creation using DBCA in 12 c

In one of my previous post I have shown you how to create Oracle 11g database using DBCA . In this post i am going to show you database creation using DBCA in 12c .

Oracle has recently made available 12c database for download and you can download it using following link 

For installation steps of 12c database you can click Installation of Oracle Database 12 c r1 on RHEL 6.1

Well , lets talk about DBCA of 12c version . Oracle has made significant changes in DBCA interactive interface and now you have two ways to create the database in DBCA .First is basic mode that is nothing but with default configuration . We have other mode called "advanced " mode where you will get more options to customize your database creation .

One more significant addition is PLUGGABLE database option . (Please read Oracle Docs for pluggable Database option) . The main database you will create is called as container database . You can not keep same name for pluggable database and container database . Let oracle announce all the new features of 12c for discussion on pluggable database to be more correct .


Installation of Oracle Database 12 c r1 on RHEL 6.1

This post shows Installation of Oracle database 12c r1 (12.1.0.1) on Red Hat Linux 6.1 64 bit OS .
For this installation I have installed RHEL 6.1 selecting all the packages available .

I will install Oracle RDBMS in  /orabin mount point under the path /orabin/app/oracle/product/12.0.1 . This path is nothing but the ORACLE HOME. For ORACLE BASE the path will be /orabin/app/oracle/product

We will create OINSTALL group which will install the software and DBA which can create the database .

Let us make the path in OS

[root@linux6 orabin]# mkdir -p /orabin/app/oracle/product/12.0.1
[root@linux6 orabin]# groupadd oinstall
[root@linux6 orabin]# groupadd dba
[root@linux6 orabin]# useradd -g oinstall -G dba -d /home/oracle -m oracle
[root@linux6 orabin]# passwd oracle
Changing password for user oracle.
New UNIX password:
BAD PASSWORD: it is based on a dictionary word
Retype new UNIX password:
passwd: all authentication tokens updated successfully.

[root@linux6 orabin]# chown -R oracle:oinstall /orabin

[root@linux6 orabin]# chown -R oracle:dba /data1 /data2

Oracle RDBMS software has been kept in /opt hence set permission to /opt so that we can unzip the RDBMS binaries .

[root@linux6 orabin]# chmod -R 777 /opt

after you finish unzip of files you will get single directory as "database" .
Now we will set the bash profile for our installation.

[root@linux6 opt]# su - oracle
[oracle@linux6 ~]$ vi .bash_profile

export ORACLE_HOME=/orabin/app/oracle/product/12.0.1
export ORACLE_SID=orcl
export PATH=$PATH:$HOME/bin
export PATH=$ORACLE_HOME/bin:$PATH:.

After setting the bash profile we can start the installation of Oracle Database.

OUI is GUI based installar hence for Allowing normal user to invoke GUI, run following command as root user.

[root@linux1 ~]# xhost +

In following Snapshots installer did not give pre-requisite check window but my installation got succeeded .  

Now its time to invoke OUI i.e runInstallar

[oracle@linux1 database]$ ./runInstallar


Friday 14 June 2013

Oracle Database Creation Using DBCA

We have many ways to create Oracle Database and we generally use following two ways.
1.Manually (Read It Here) 
2.Using DBCA

My previous post shows how to create database manually .This post will show you how to create database through DBCA.

DBCA - This is a utility provided by Oracle to create database in GUI mode. Once you invoke dbca it will guide you step by step in a interactive mode to complete  database creation. You will also get option to configure dbcontrol along with database creation.

For invoking dbca you wil l have to set oracle home properly or you can directly run the utility from $ORACLE_HOME/bin . Make sure that before invoking dbca you have issued "xhost +" command from root prompt.

$ dbca


 This is the welcome page - click next
 Here you can choose general purpose database or can go for custom database which will provide you lot more option to choose . If you choose custom database then you can greatly customize your database . I will choose general purpose database.
 Here you have option to decide on SID and database name. You can keep same or keep different values.
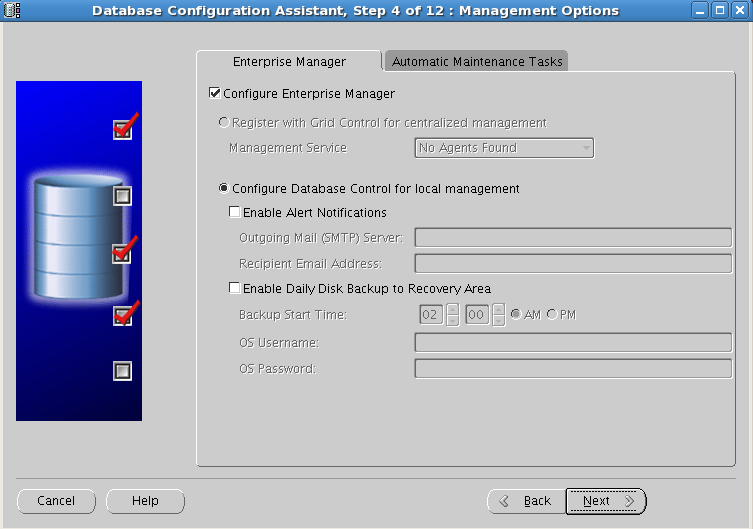
 In this window you have choice to configure db console along with db creation . Db console will give you chance to manage database in GUI mode through the browser. If you don't want to configure db console then uncheck the radio button . I chose to go with db console.
 Choose to give different password for each user or give same password for all users.
 If you give a weak password then this warning will be shown. Choose "yes" .
 I will keep all the database files in single location on file system so i checked "use common location for all database files". Here you can also choose ASM .
 You can configure FRA and can enable archival . If you choose to any of the option or both then you have the option to set the path also.
 Choose the path for archive log destination.
 You can choose to install the sample schemas in your database .
 Here you  can choose the desired value of memory size with which your instance will allocate size of SGA and PGA. This also gives you the option to go for automatic memory management which will relax you from manually sizing the memory components .
 Set the maximum number of processes that will be allowed to run for Oracle instance.
 Choose the character set and click next.
 You can have a look on default parameters setting and can also edit there values.
 Choose the connection mode on your database. Details are given with each option .

 You can edit the locations , number and sizes of contolfiles, datafiles and redolog groups here.


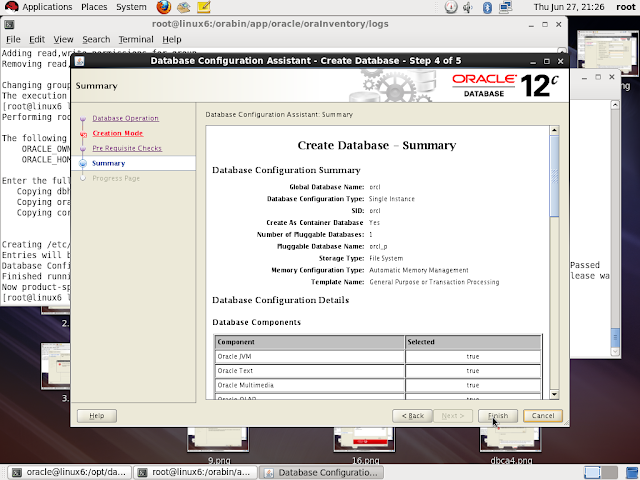
 Click on finish to start the database creation.


Here the window shows you the summary of your settings that will be used for database creation .
Now the database creation will start.


After completion of DB creation you can see the result and can note the URL to access the dbconsole.
Click exit to close the DBCA.

..........................  :)